VSCode with TerosHDL Extension
 VSCode is a popular code editor that can be extended with plugins to support various programming languages and tools. One of these plugins is TerosHDL, which is a plugin for VHDL and Verilog development. This guide will show you how to set up VSCode with TerosHDL, Yosys + GHDL and GTKViewer to simulate VHDL code.
Installation
The setup is not straightforward, but if you follow the steps below, you should be able to set up VSCode with TerosHDL and GHDL.
Installing VSCode
Download and install Visual Studio Code from the official website.
Open VSCode and install the TerosHDL plugin by clicking on the Extensions icon on the left sidebar and searching for “TerosHDL”. This guide uses TerosHDL 6.0.14, but the latest version should work as well.
Install the plugin and close VSCode.
Installing Python
Download and install Python from the official website. This guide uses Python 3.12, but the lastest, stable version should work as well.
During the installation, make sure to check the box “Add Python to PATH”.
Open a terminal and run the following command to install the required Python packages:
python -m pip install terosHDL
Close the command prompt.
Installing GHDL + GTKWave + Yosys
Download and install MSYS2 from the official website. It’s recommended to not change the default installation path, as this guide will assume that MSYS2 is installed in the default
C:\msys64.Open the MSYS2 UCRT64 terminal and run the following command to install GHDL (Use the
INSERTkey or right-click to paste the command):
pacman -S make mingw-w64-ucrt-x86_64-make mingw-w64-ucrt-x86_64-ghdl-llvm mingw-w64-ucrt-x86_64-gtkwave mingw-w64-ucrt-x86_64-yosys
Close the terminal.
Setup
After installing the required tools, you need to set up VSCode with TerosHDL and GHDL.
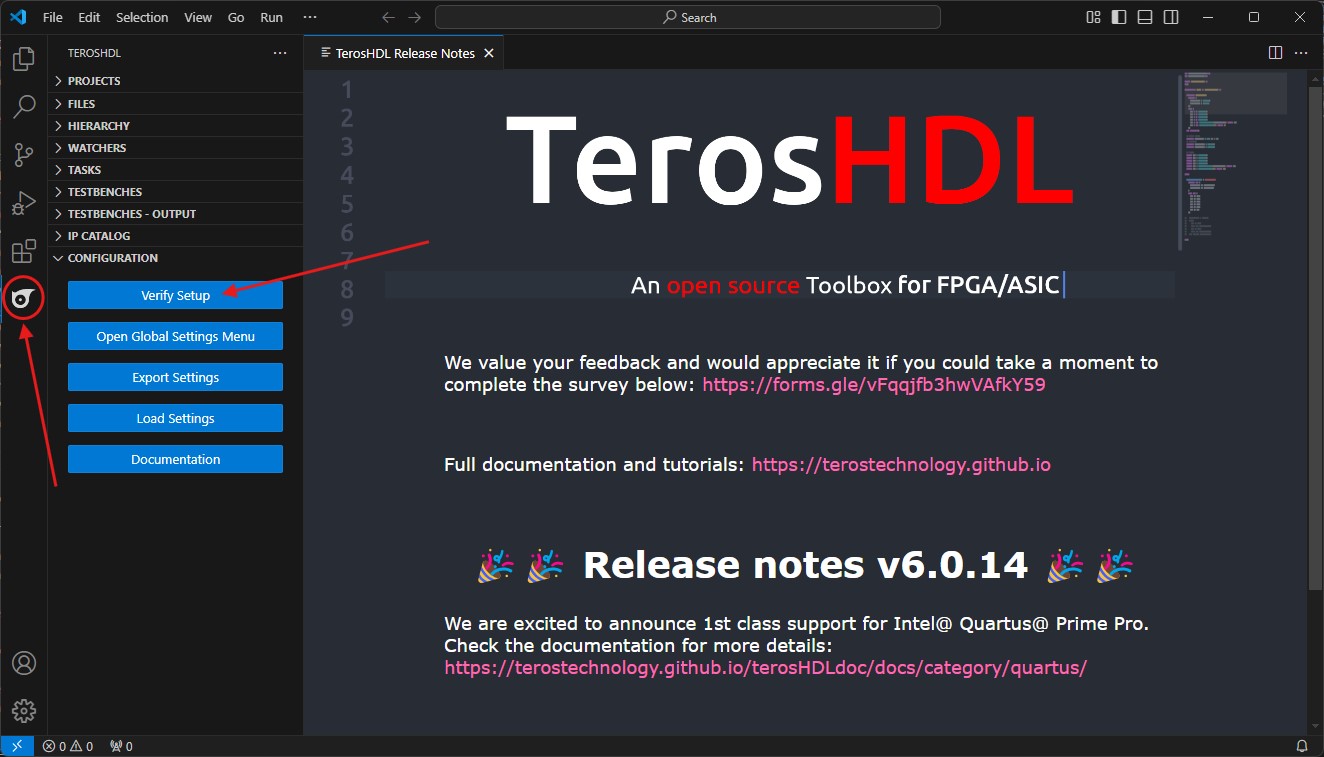
Open VSCode and click on the TerosHDL icon on the left sidebar.
In that sidebar, under
CONFIGURATION, click onOpen Global Settings Menu.
The configuration window of TerosHDL should be open. Change the configuration as follows:
General → Make binary directory:Set this toC:\msys64\usr\bin.Linter settings → Verilog/SV linter:Set this toDisabled, if you don’t plan to set up ModelSim later on.Schematic viewer → Select the backend:Set this toGHDL + Yosys.Tools → Select a tool, framework, simulator...Set this to GHDL.Note: Here you can change the simulator to ModelSim or Questa if you have them installed - for now, this guide will focus on GHDL.
Tools → GTKWave installation directory:Set this toC:\msys64\ucrt64\bin.Note: If you prefer a different waveform viewer like Surfer, rename the executable to
gtkwave.exeand set the path your preferred waveform viewer instead.Tools → Select the execution modeSet this toGUI.Note: If you don’t need the graphical waveforms or to run automated tests, you can switch it to
Command lineat any point in the future. .Tools → Yosys → Installation path:Set this toC:\msys64\ucrt64\bin.Tools → GHDL → Installation path:Set this toC:\msys64\ucrt64\bin.Note: Changing the
Waveform output format:fromVCDtoGHWis recommended, if GTKWave is used for waveform viewing.
Note: If you have ModelSim:
Tools → ModelSim → Installation path:Set this to the path where ModelSim is installed, for exampleC:\intelFPGA_lite\18.1\modelsim_ase\win32aloemNote: If you have Questa:
Tools → Questa → Installation path:Set this to the path where Questa is installed, for exampleC:\intelFPGA_lite\23.1std\questa_fse\win64
In that sidebar, under
CONFIGURATION, click onVerify Setup.If everything is set up correctly, there should only be one warning about the
cocotbcommand. You can ignore this warning.
Usage
After setting up VSCode with TerosHDL and GHDL, you can start writing VHDL code and simulate it using GHDL. This guide will use the Getting Started Project from the Intel Quartus Prime Tool Guide as an example.
Download the Getting Started Project and extract it to a fitting project directory with no spaces in the path.
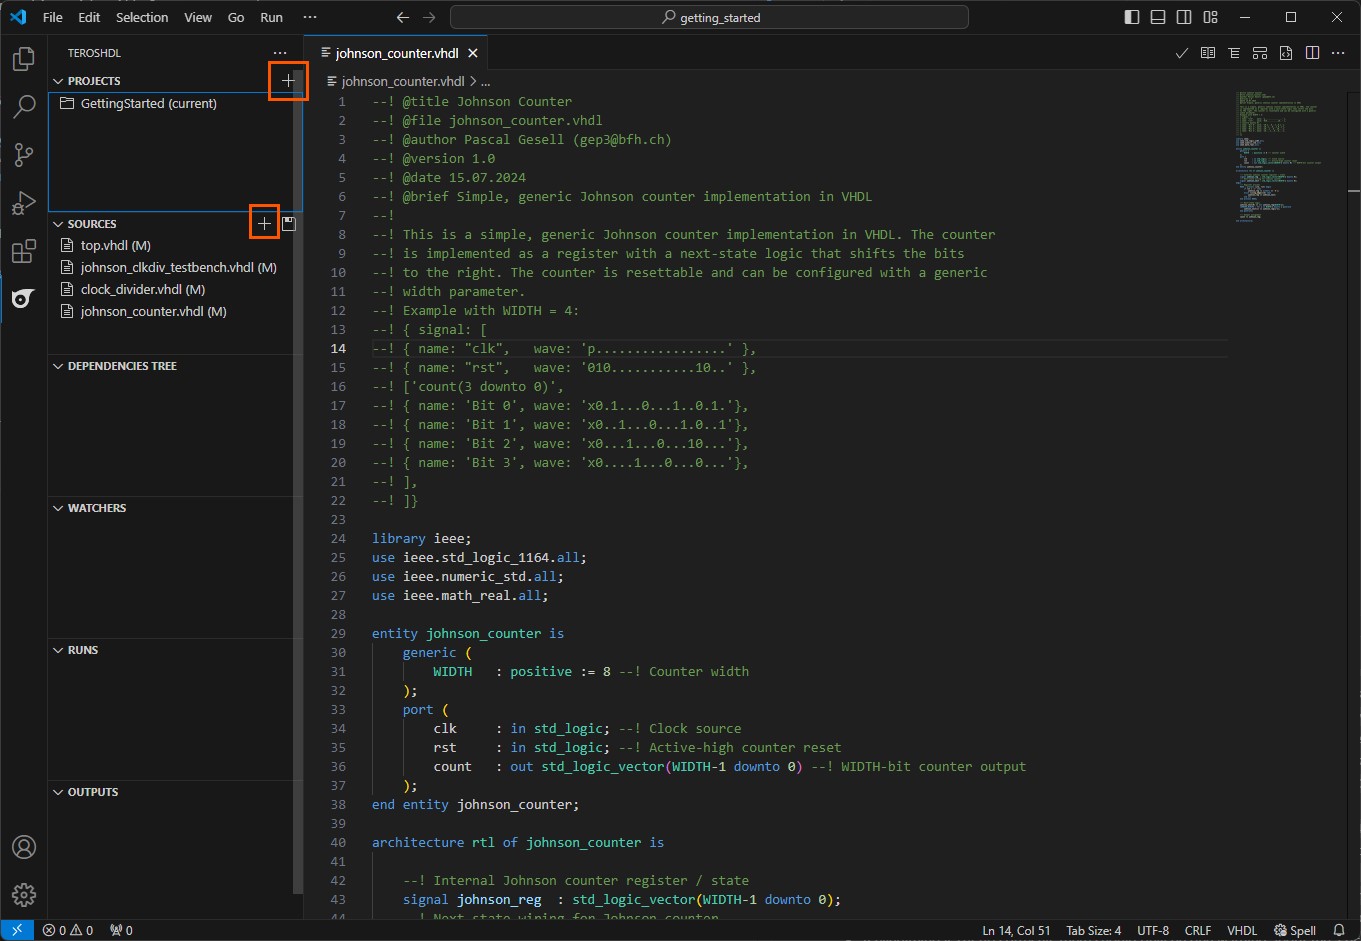
Open VSCode and click on
File → Open Folder...and select the project directory.Your VSCode should look similar to the image below:

Open the
TerosHDLsidebar and click onNew Projectto create a new project.Select
Empty projectand give it a name of your choice, for exampleGettingStarted.In the
Sourcessection, click on the small+icon and selectSource. Add all files from theGetting Startedproject to the source folder.Open the
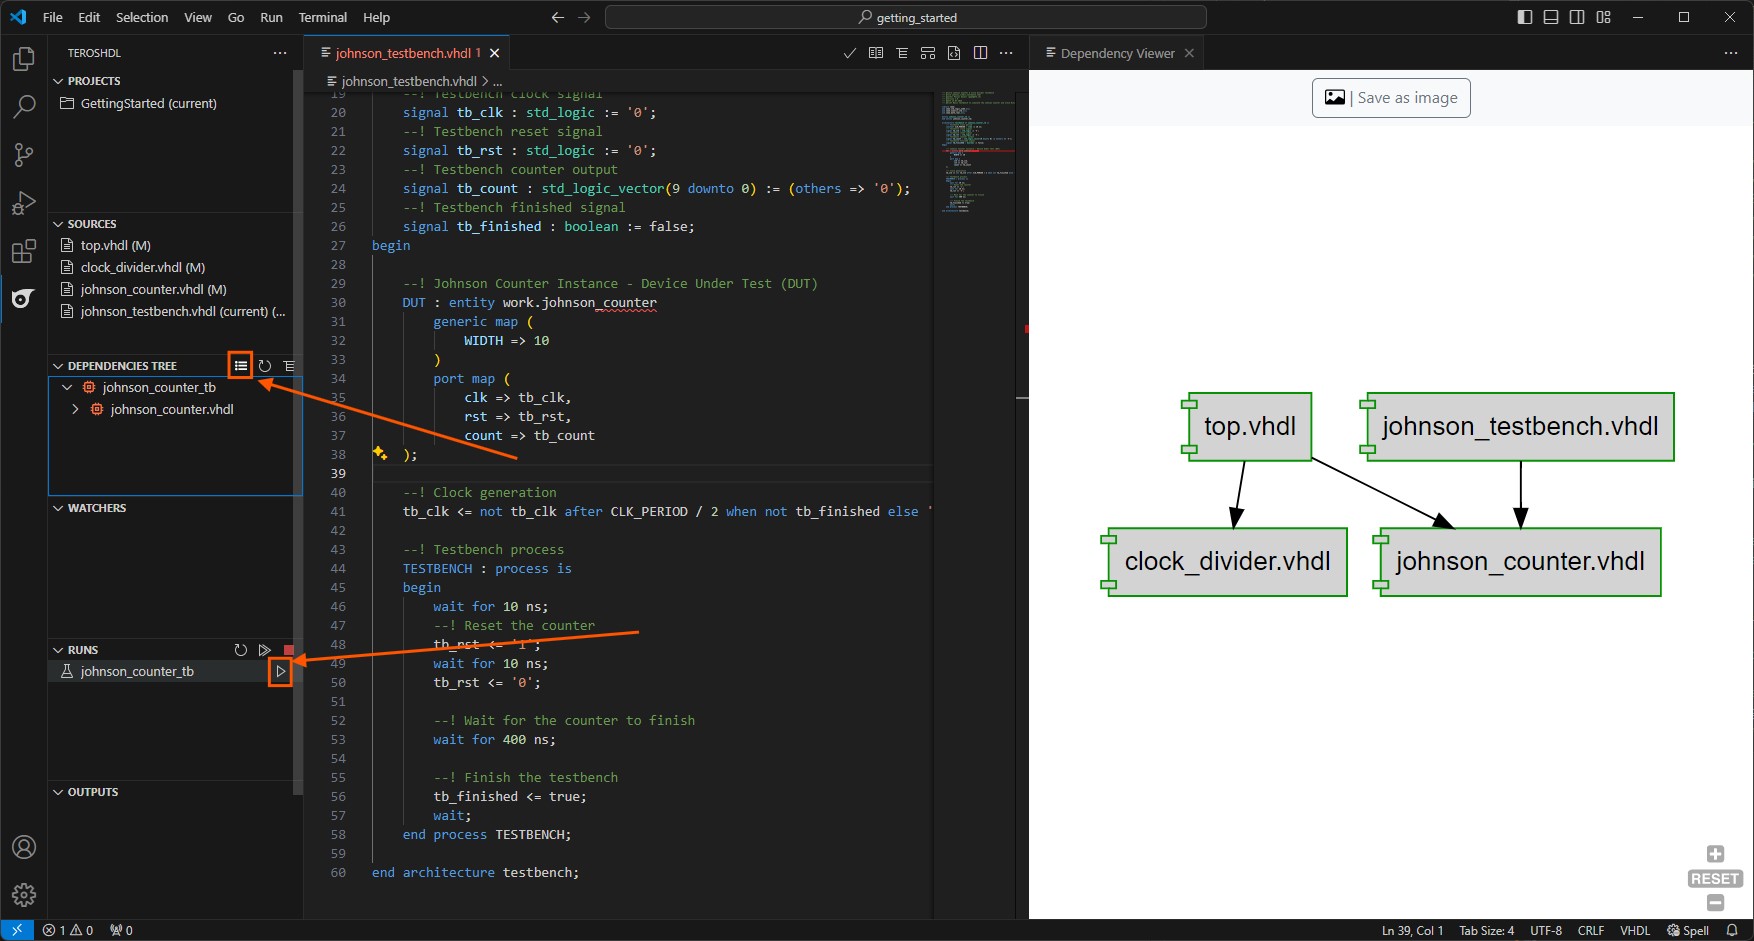
johnson_counter.vhdlfile. Your VSCode should look similar to the image below:
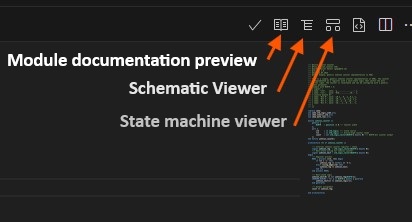
When TerosHDL is properly configured, it features many powerful tools that help you visualize your VHDL code or document it in an elegant way. Feel free to explore these features and experiment with the tools provided by TerosHDL.
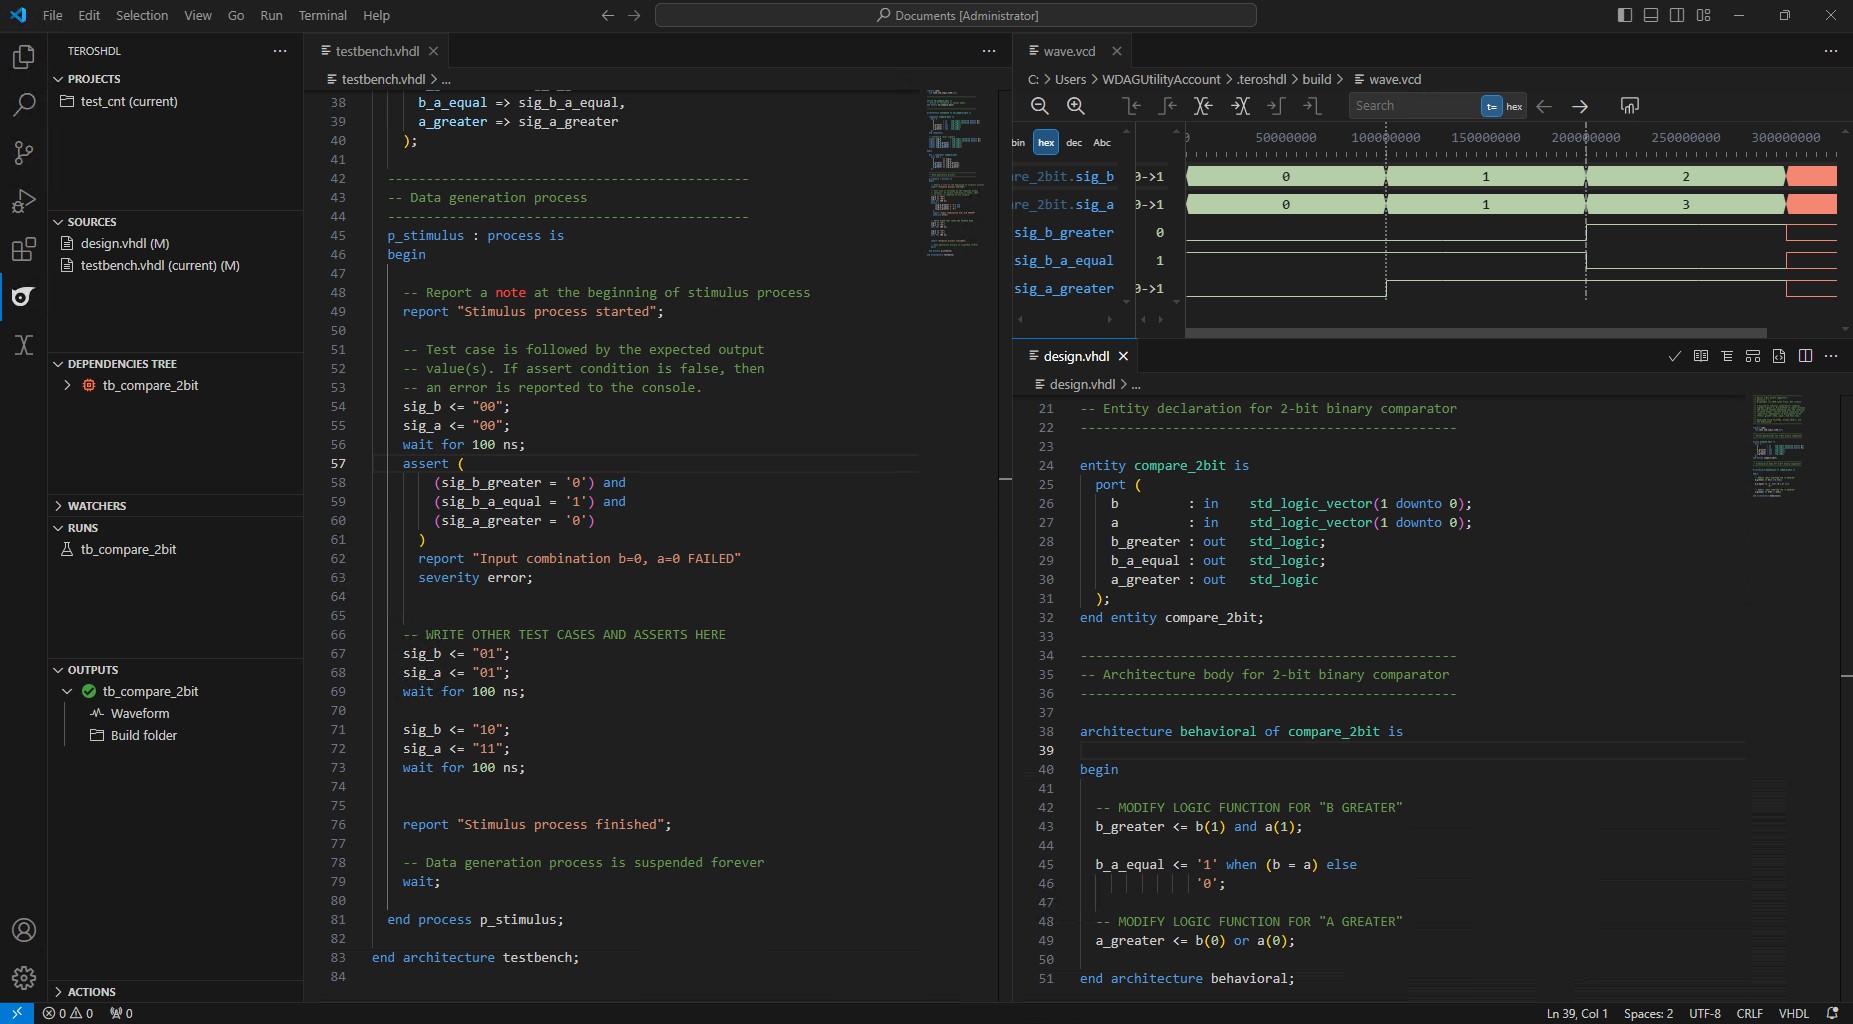
To simulate the VHDL code, select the testbench file by clicking the small
✓icon next to the file name.The
Dependencies Treeshould show the testbench file and the files it depends on. By clicking the small symbol in theDependencies Tree, you can open theDependencies Viewerto see the dependencies in a graphical way.To start the simulation, click on the small
▶icon in theRunssection, right onjohnson_counter_tbname.
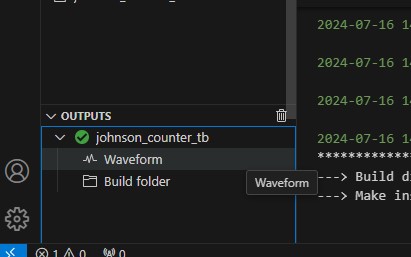
The VSCode terminal might open and show various debug information. If everything is set up correctly, the simulation should run without any errors and display the simulation result in the
Outputssection. Unfold it and click on theWaveformlink to open the waveform viewer.
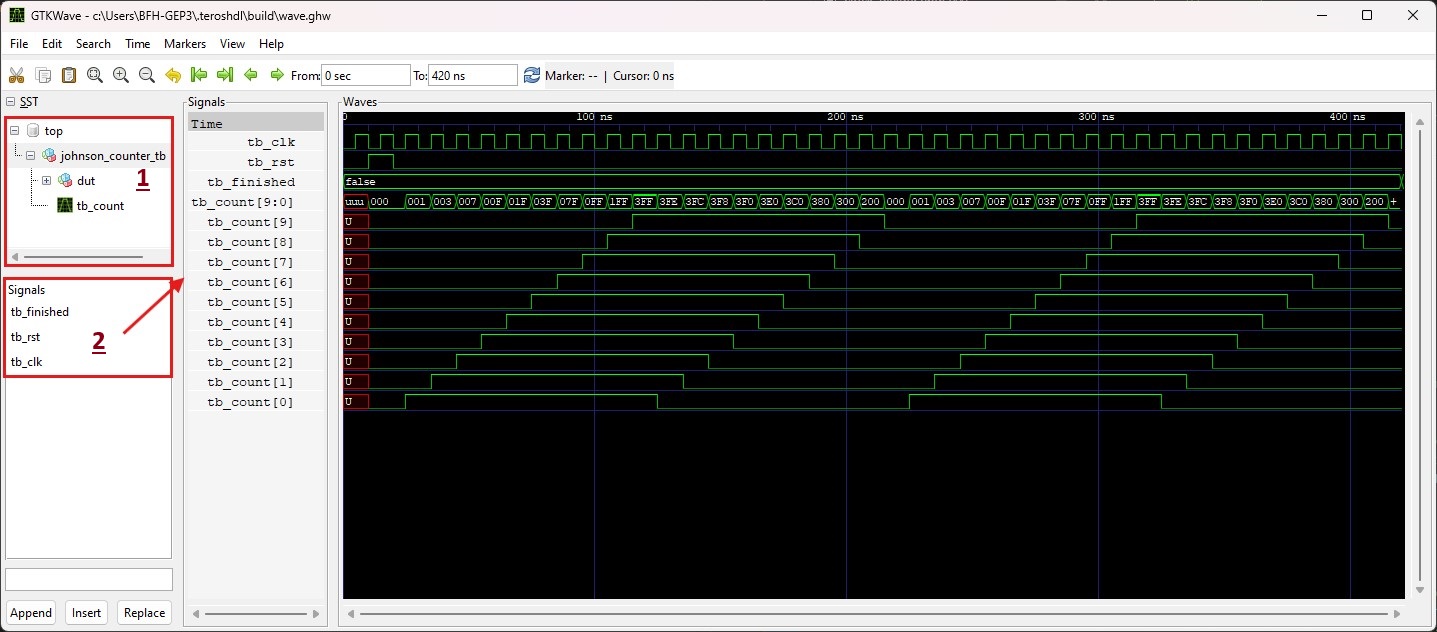
The waveform viewer should open and display the simulation results. Unfold the
topandjohnson_counter_tbnodes to see the signals and their values.Click
johnson_counter_tbto show the available signals below. Drag & drop them to theSignalslist to display them and do the same fortb_count.Double-click on the
tb_count[9:0]in theSignalslist to unfold it and see the individual bits of the signal.To
Zoom Fiteither press theZoom Fiticon or pressShift + Alt + Fon your keyboard.
Congratulations! You have successfully set up VSCode with TerosHDL and GHDL to simulate VHDL code. Feel free to explore the features of TerosHDL and experiment with your VHDL projects.